
We love promoting new ways to express your art (and defo not to cause enormous paint covering in speciesist businesses) so if you have been wondering about how you can paint places quickly, we have a great recipe for yo: How to fill fire extinguishers with paint!
Note that PalAction actually wrote an amazing guide which you can download at the end of the article. Whilst we give an overview of the steps to convert a fire extinguisher into a weapon of mass paintaction, it is not only inspired by their guide but you should actually follow their guide as it has all the details we cannot fit into a short post.
STUFF YOU NEED:
- Extinguisher
- Paint, water, funnel
- Air compressor or high quality pump.
- Hack Saw, rubber mallet.
- A metal 1/4” BSP Taper Male Thread x 1/8” BSPT Female Thread Hex Bush.
- A 1/8” BSPT Male Thread High Pressure Schrader Valve.
- Barbed Hose Joiner, Barbe Hose Tail End Connector (check PDF for sizing)
LET’S GET THIS DONE!
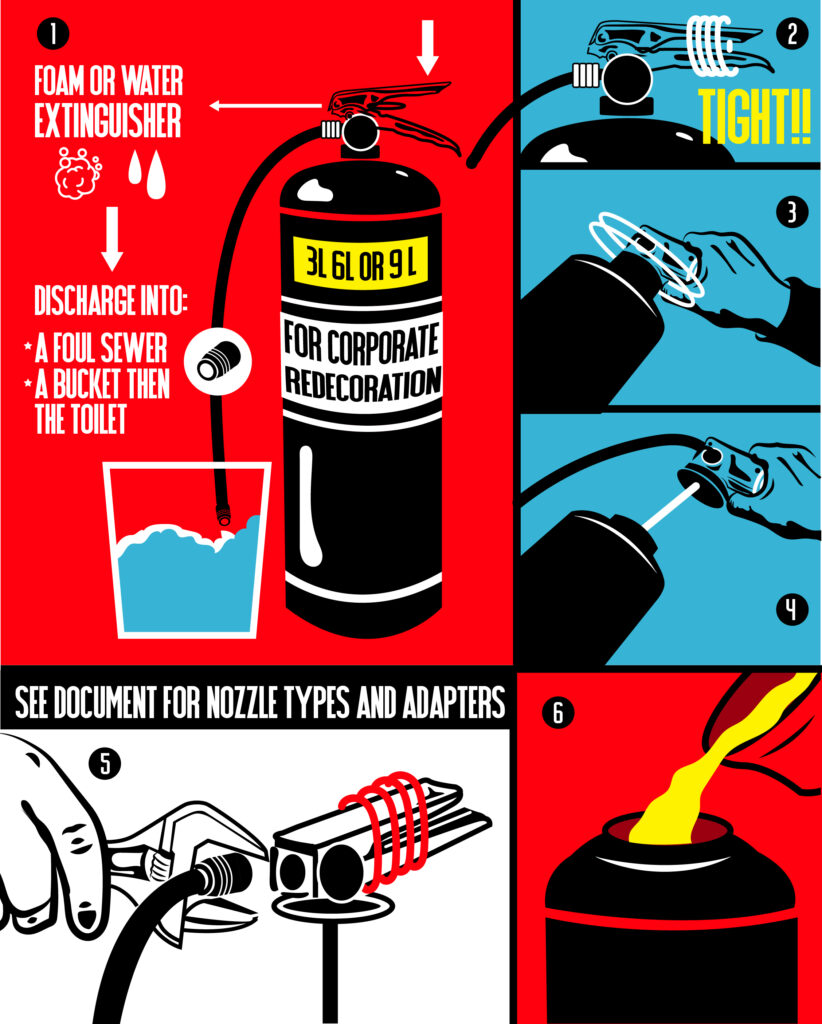
1- Discharge the extinguisher. Ideally on some bailiffs, but if you can’t then remember foam and water extinguishers are full of shit, discharge in a bucket then empty into a toilet for fowl sewage disposal. CO2 and dust are “less” harmful.
2- Tie the operating leavers together. Then with force (or a rubber mallet) push anticlockwise on the leavers to release them. Unscrew full and pull valve and syphon tube out. Make sure you properly clean the innards of that fire extinguisher!
3- Remove the syphon tube filter. Either unscrew it if it lets you, or cut it out (as low as possible to not reduce length!
4- Unscrew the pipe from the valve assembly. In its place, screw the Hex Bush with a few layers of PTFE tape. To the Hex Bush, screw the Schrader Valve (that’s where you’ll pump the air in!!!!)
5- Fill the extinguisher with a mix of Matt emulsion and Water at equal parts. Please measure the volume of watered down paint and ensure you only fill up to the volume of the fire extinguisher and no more.
6- Screw the Valve assembly. Ensure that the leavers are fully engaged and tied/taped. Use your air compressor or pump to depressurise the system to the middle of the green zone on the pressure gauge. That should be around 14-15 BAR which will be perfect for your arts and crafts.
7- Release the operating leavers, either untie, un tape or whatever else. This will then hold the pressure inside, if you don’t do this you’ll end up covered in paint in the next step!
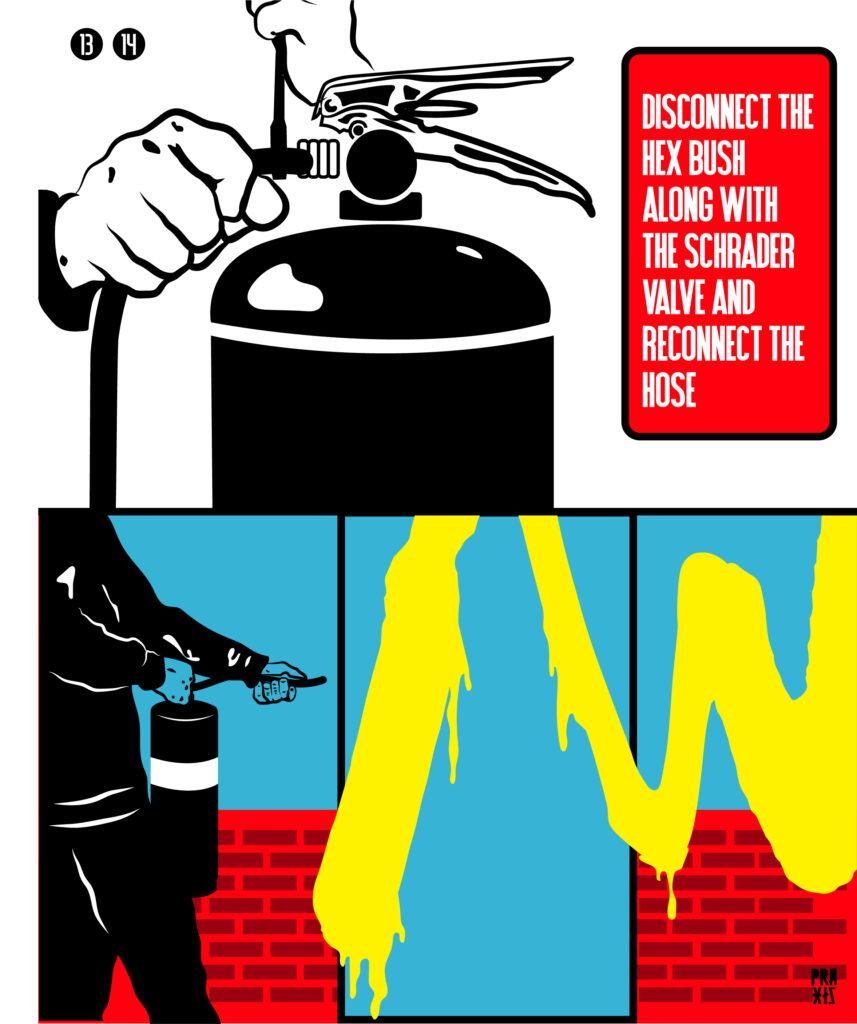
8- Unscrew the air compressor pipe, then with an adjustable spanner wind the Hex bush anticlockwise to disconnect it.
9- Modify the hose nozzle. Please read about this on PalAction’s PDF. Once the hose is good, screw it into the operating valve. You can tighten it a tad with a spanner.
10- Insert the pin and secure the extinguisher by taping that pin in place. Only remove it when you’re up to no good painting your room!
DOWNLOAD THE FIRE EXTINGUISHER GUIDE BY PAL ACTION HERE:
